Features for publishers#
Adding a new dataset#
Note
You may need an user account in order to add and edit datasets.
Step 1. You can access CKAN’s “Create dataset” screen in two ways.
Select the “Datasets” link at the top of any page. From this, above the search box, select the “Add Dataset” button.
Alternatively, select the “projects” link at the top of a page. Now select the page for the project that should own your new dataset. Provided that you are a member of this project, you can now select the “Add Dataset” button above the search box.
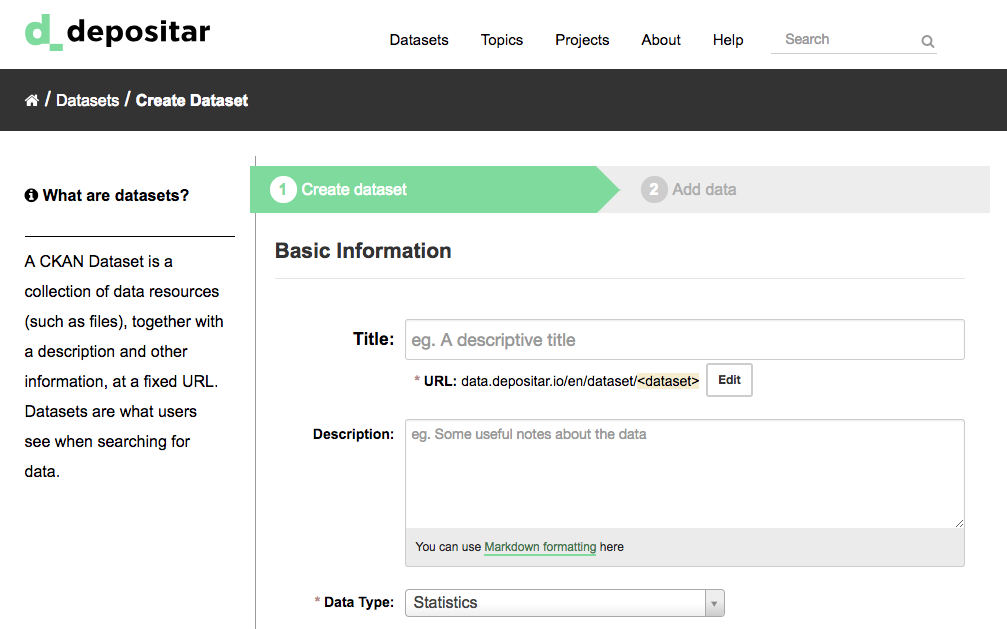
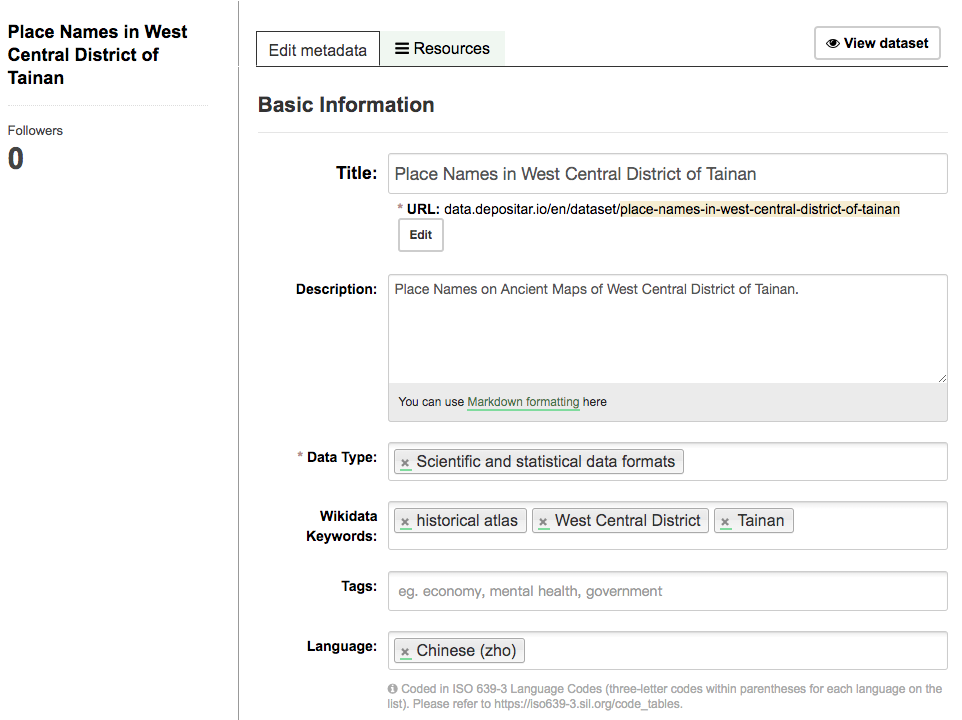
Step 2. CKAN will ask for the information about your data (See Dataset Level).
Note
By default, the only required field on this page is the title. However, it is good practice to include, at the minimum, a short description and, if possible, the license information. You should ensure that you choose the correct project for the dataset, since at present, this cannot be changed later. You can edit or add to the other fields later.
Step 3. When you have filled in the information on this page, select the “Next: Add Data” button. (Alternatively select “Cancel” to discard the information filled in.)
Step 4. CKAN will display the “Add data” screen.
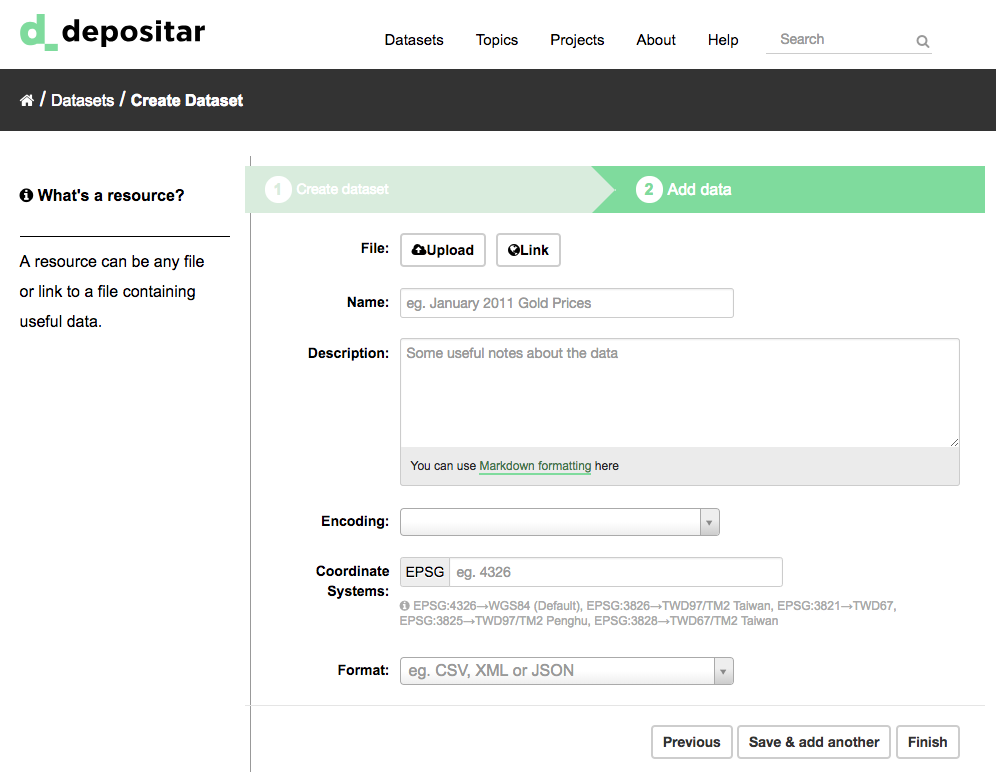
This is where you will add one or more “resources” which contain the data for this dataset. Choose a file or link for your data resource and select the appropriate choice at the top of the screen:
If you are giving CKAN a link to the data, like
http://example.com/mydata.csv, then select “Link to a file” or “Link to an API”. (If you don’t know what an API is, you don’t need to worry about this option - select “Link to a file”.)If the data to be added to CKAN is in a file on your computer, select “Upload a file”. CKAN will give you a file browser to select it.
Step 5. Add the other information on the page. (Please refer to Resource Level) CKAN does not require this information, but it is good practice to add it.
Step 6. If you have more resources (files or links) to add to the dataset, select the “Save & add another” button. When you have finished adding resources, select “Next: Additional Info”.
Step 7. Select the ‘Finish’ button. CKAN creates the dataset and shows you the result. You have finished!
You should be able to find your dataset by typing the title, or some relevant words from the description, into the search box on any page in your CKAN instance. For more information about finding data, see the section Finding data.
Extended feature — Add a dataset to an existing topic#
The topic is different from “Projects” feature as the latter is the way to control the visibility of datasets in CKAN and each dataset can belong to ONLY ONE project.
We refer to the Wikipedia’s categories to define the following topics:
General reference
Culture and the arts
Geography and places
Health and fitness
History and events
Human activities
Mathematics and logic
Natural and physical sciences
People and self
Philosophy and thinking
Religion and belief systems
Society and social sciences
Technology and applied sciences
You can also use the following topics, which are based on ISO19115 standard:
farming: Rearing of animals or cultivation of plants, for example agriculture, irrigation, aquaculture, plantations, herding, pests and diseases affecting crops and livestock
biota: Flora or fauna in natural environment, for example wildlife, vegetation, biological sciences, ecology, wilderness, sea life, wetlands, habitat, biological resources
boundaries: Legal land descriptions, for example political and administrative boundaries, governmental units, marine boundaries, voting districts, school districts, international boundaries
climatologyMeteorologyAtmosphere: Processes and phenomena of the atmosphere, for example cloud cover, weather, climate, atmospheric conditions, climate change, precipitation
economy Economic activities, conditions, and employment, for example production, labor, revenue, business, commerce, industry, tourism and ecotourism, forestry, fisheries, commercial or subsistence hunting, exploration and exploitation of resources such as minerals, oil and gas
elevation Height above or below seal level, for example altitude, bathymetry, digital elevation models, slope, derived products, DEMs, TINs
environment Environmental resources, protection and conservation, for example environmental pollution, waste storage and treatment, environmental impact assessment, monitoring environmental risk, nature reserves, landscape, water quality, air quality, environmental modeling
geoscientificInformation Information pertaining to earth sciences, for example geophysical features and processes, geology, minerals, sciences dealing with the composition, structure and origin of the earth’s rocks, risks of earthquakes, volcanic activity, landslides, gravity information, soils, permafrost, hydrogeology, groundwater, erosion
health Health, health services, human ecology, and safety, for example disease and illness, factors affecting health, hygiene, substance abuse, mental and physical health, health services, health care providers, public health
imageryBaseMapsEarthCover Base maps, for example land/earth cover, topographic maps, imagery, unclassified images, annotations, digital ortho imagery
intelligenceMilitary Military bases, structures, activities, for example barracks, training grounds, military transportation, information collection
inlandWaters Inland water features, drainage systems and characteristics, for example rivers and glaciers, salt lakes, water utilization plans, dams, currents, floods and flood hazards, water quality, hydrographic charts, watersheds, wetlands, hydrography
location Positional information and services, for example addresses, geodetic networks, geodetic control points, postal zones and services, place names, geographic names
oceans Features and characteristics of salt water bodies (excluding inland waters), for example tides, tidal waves, coastal information, reefs, maritime, outer continental shelf submerged lands, shoreline
planningCadastre Information used for appropriate actions for future use of the land, for example land use maps, zoning maps, cadastral surveys, land ownership, parcels, easements, tax maps, federal land ownership status, public land conveyance records
society Characteristics of society and culture, for example settlements, housing, anthropology, archaeology, education, traditional beliefs, manners and customs, demographic data, tourism, recreational areas and activities, parks, recreational trails, historical sites, cultural resources, social impact assessments, crime and justice, law enforcement, census information, immigration, ethnicity
structure Man-made construction, for example buildings, museums, churches, factories, housing, monuments, shops, towers, building footprints, architectural and structural plans
transportation Means and aids for conveying persons or goods, for example roads, airports/airstrips, shipping routes, tunnels nautical charts, vehicle or vessel location, aeronautical charts, railways
utilitiesCommunication Energy, water and waste systems and communications infrastructure and services, for example hydroelectricity, geothermal, solar and nuclear sources of energy, water purification and distribution, sewage collection and disposal, electricity and gas distribution, data communication, telecommunication, radio, communication networks
Before adding a dataset to a theme, you should complete the upload process of the dataset (listed on the Adding a new dataset). Then do the following steps:
Go to the dataset’s page. You can find it by entering the title in the search box on any page.
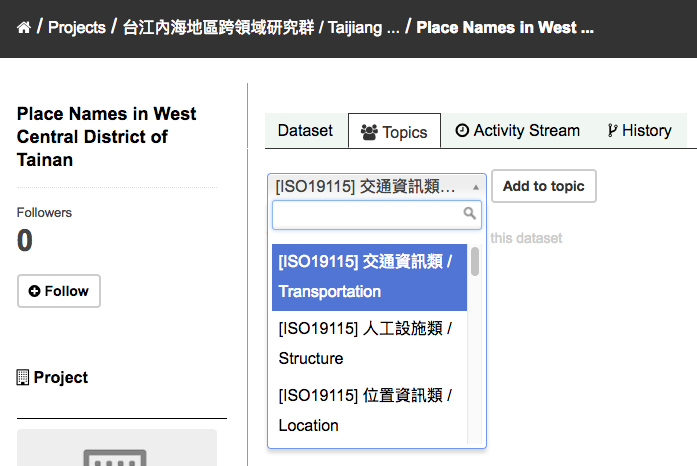
Select the “Topics” tab in the dataset’s page.
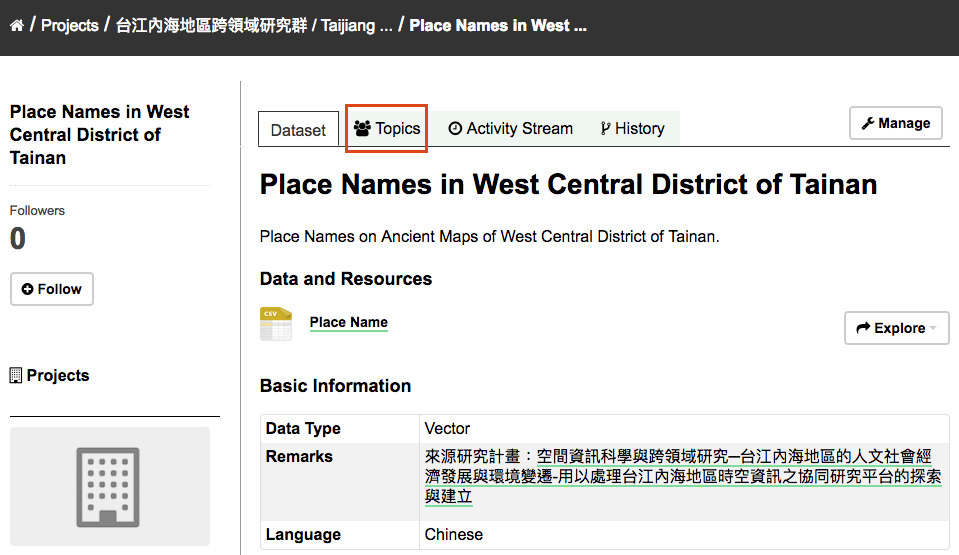
Select an existing topic and select the “Add to topic” button.
Extended feature — Fill-in snippet#
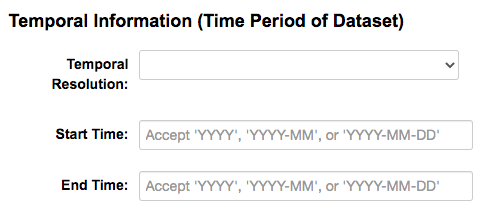
Temporal Information (Time Period of Dataset)
The “temporal information” here means the time to events related to the dataset, not the time when the resources in the dataset were created.
Temporal Resolution – This refers to the precision of a measurement with respect to time. It can be the minimal time interval between subsequent examinations, or the maximum time error when the time period is uncertain.
Start and End Time – This refers the beginning and end time of the time period. Acceptable formats: “YYYY”, “YYYY-MM”, or “YYYY-MM-DD”.
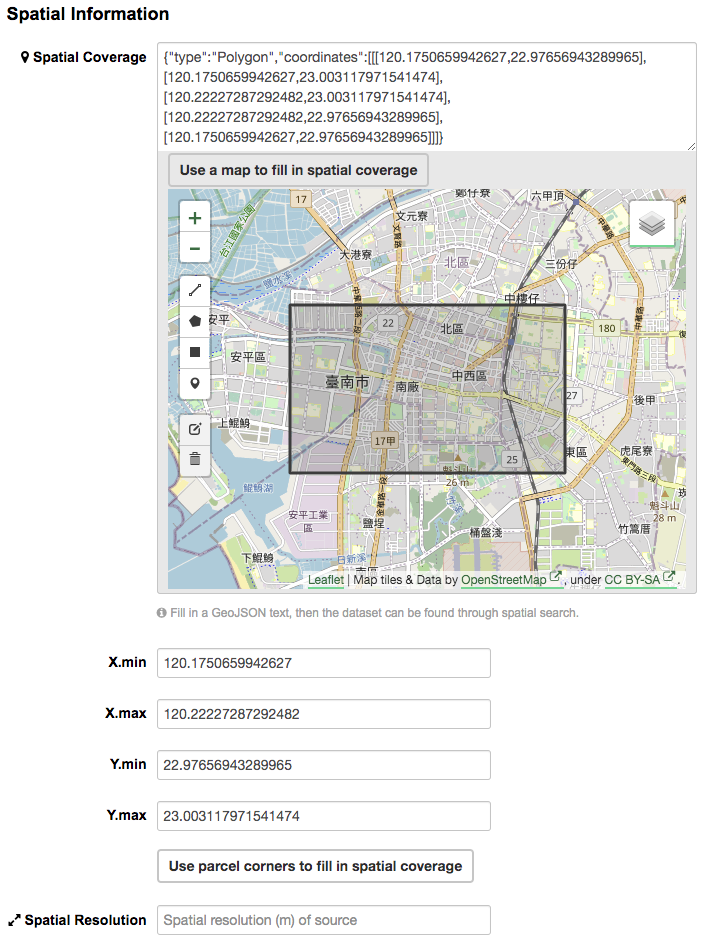
Spatial Information
Here you can specify the spatial extent of the dataset for indexing, then the dataset can be found through spatial search.
You can use the following two methods to generate a valid spatial extent in GeoJSON format:
Using a Map – You can also add the spatial extent through digitizing process. Select the “Use a map to fill in spatial coverage” button and draw a polyline, polygon, rectangle, or marker on the expanded map to generate the spatial extent.
Convert from Parcel Corner – If you already have the longitude and latitude of the corners for the parcel to describe the dataset, you can fill in the X.min, X.max, Y.mim, and Y.max fields, then select the “Use parcel corners to fill in spatial coverage” button to generate the spatial extent.
You can also fill in the spatial resolution of the dataset here.
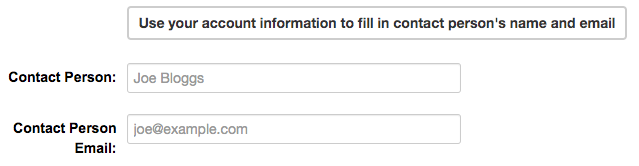
Auto-completion of management metadata
You can use the “Use your account information to fill in contact person’s name and email” button
to automatically fill in the contact person’s information (Contact Person and Contact Person Email)
using your account information (for account information, please refer to Managing your user profile).
Editing a dataset#
You can edit the dataset you have created, or any dataset owned by an project that you are a member of. (If a dataset is not owned by any project, then any registered user can edit it.)
Go to the dataset’s page. You can find it by entering the title in the search box on any page.
Select the “Edit” button, which you should see above the dataset title.
CKAN displays the “Edit dataset” screen. You can edit any of the fields (Title, Description, Dataset, etc), change the visibility (Private/Public), and add or delete tags or custom fields. For details of these fields, see Adding a new dataset.
When you have finished, select the “Update dataset” button to save your changes.
Dataset collaborators#
In addition to traditional project-based permissions, CKAN instances can also enable the dataset collaborators feature, which allows dataset-level authorization. This provides more granular control over who can access and modify datasets that belong to a project, or allows authorization setups not based on projects.
You can manage dataset collaborators through the “Collaborators” tab in the “Edit dataset” page.
By default, only Administrators of the project a dataset belongs to can add collaborators to a dataset. When adding them, they can choose between two roles: member and editor.
A member can:
View the dataset if it is private.
An editor can do everything a member can plus:
Make the dataset public or private.
Edit or delete the dataset (including assigning it to a project).
Adding, deleting and editing resources#
Go to the dataset’s “Edit dataset” page (steps 1-2 above).
In the left sidebar, there are options for editing resources. You can select an existing resource (to edit or delete it), or select “Add new resource”.
You can edit the information about the resource or change the linked or uploaded file. For details, see steps 4-5 of “Adding a new resource”, above.
When you have finished editing, select the button marked “Update resource” (or “Add”, for a new resource) to save your changes. Alternatively, to delete the resource, select the “Delete resource” button.
Deleting a dataset#
Go to the dataset’s “Edit dataset” page (see “Editing a dataset”, above).
Select the “Delete” button.
CKAN displays a confirmation dialog box. To complete deletion of the dataset, select “Confirm”.
Note
The “Deleted” dataset is not completely deleted. It is hidden, so it does not show up in any searches, etc. However, by visiting the URL for the dataset’s page, it can still be seen (by users with appropriate authorization), and “undeleted” if necessary. If it is important to completely delete the dataset, contact your site administrator.
Creating a project#
In general, each dataset is owned by one project. Each project includes certain users, who can modify its datasets and create new ones. Different levels of access privileges within a project can be given to users, e.g. some users might be able to edit datasets but not create new ones, or to create datasets but not publish them. Each project has a home page, where users can find some information about the project and search within its datasets. This allows different data publishing departments, bodies, etc to control their own publishing policies.
To create a project:
Select the “Projects” link at the top of any page.
Select the “Add Project” button below the search box.
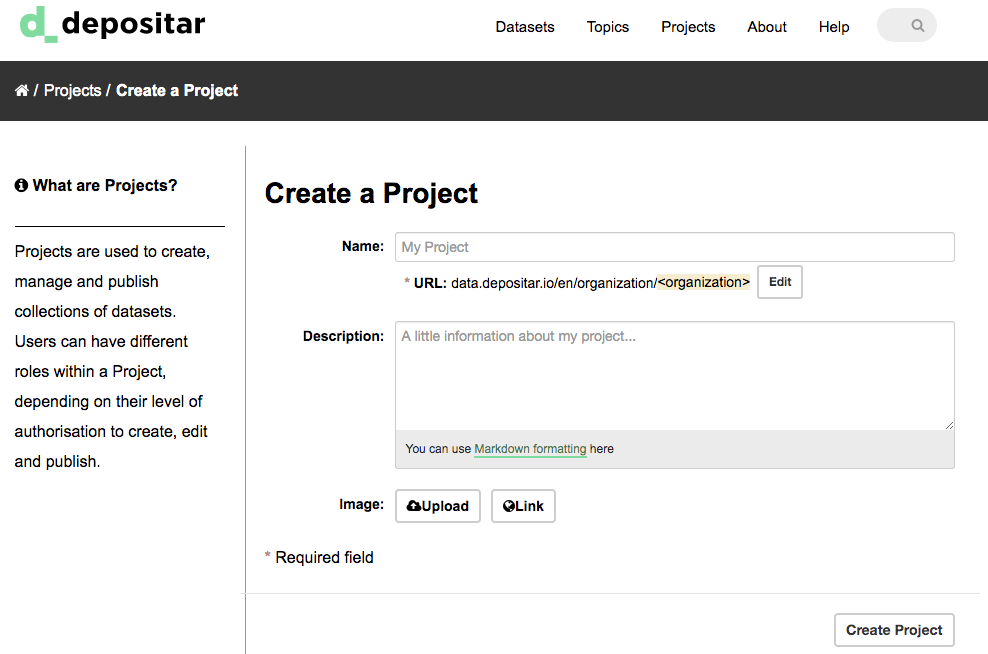
CKAN displays the “Create a Project” page.
Enter a name for the project, and, optionally, a description and image URL for the project’s home page.
Select the “Create Project” button. CKAN creates your project and displays its home page. Initially, of course, the project has no datasets.
You can now change the access privileges to the project for other users - see Managing a project below. You can also create datasets owned by the project; see Adding a new dataset above.
Note
You can learn how to fill in the information above by referring to existing projects. And, depending on how CKAN is set up, you may not be authorized to create new projects. In this case, if you need a new project, you will need to contact your site administrator.
Managing a project#
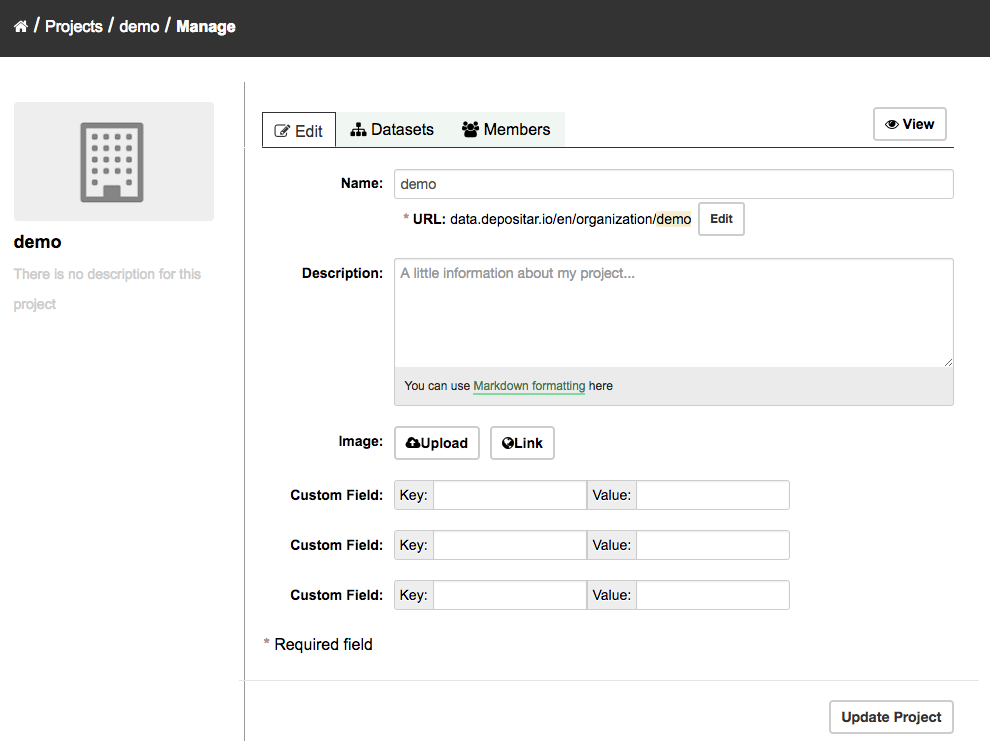
When you create a project, CKAN automatically makes you its “Admin”. From the project’s page you should see an “Admin” button above the search box. When you select this, CKAN displays the project admin page. This page has two tabs:
Info – Here you can edit the information supplied when the project was created (title, description and image).
Members – Here you can add, remove and change access roles for different users in the project. Note: you will need to know their username on CKAN.
By default CKAN allows members of projects with three roles:
Member – can see the project’s private datasets
Editor – can edit and publish datasets
Admin – can add, remove and change roles for project members
Inviting others to project#
If you want to invite others to collaborate on datasets, you can invite them to your project. From the project’s page you should see an “Admin” button above the search box. When you select this, CKAN displays the project admin page.
Select the “Members” tab, and you will see the project members page. Then select the “Add Member” button.
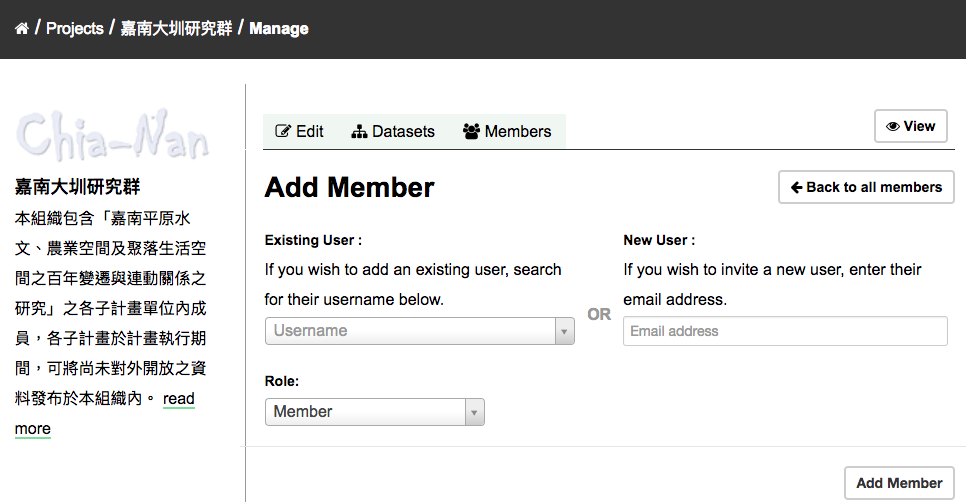
You can invite an user to your project by his/her username in the “Existing User” section. Or you can invite a new user via email.